Votre choix s’applique sur cette page, mais le navigateur n’a pas permis de l’enregistrer. Nous pourrons vous le demander à nouveau lors de votre prochaine visite.
▷Vidéo YouTube
Pour lire cette vidéo, activez les médias externes dans les paramètres des cookies.
Personas are one of the most useful AI tools at our disposal. They serve to customize
artificial
intelligence to the needs of specific people and tasks.
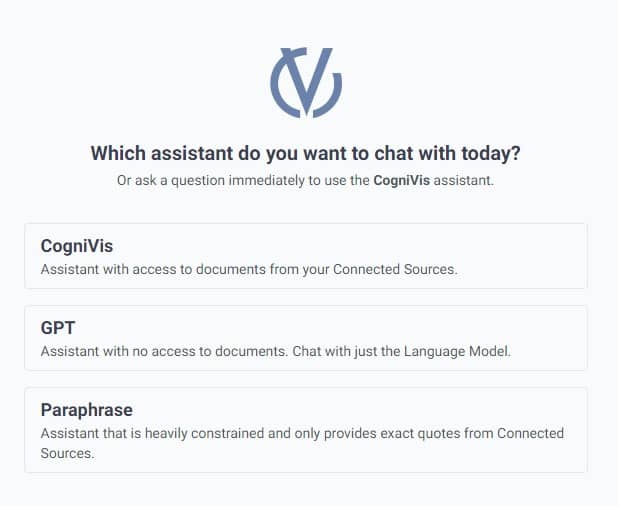
We've already mentioned them in the first lesson of this section - three default ones set up at the
start in our AI
chat.
Let's recap:
GPT - a chatbot with only general knowledge, exactly the same as ChatGPT
Paraphrase - this chatbot will operate solely on the information found in the sources you have
attached (for example, in your knowledge base) and will not add any additional information on its own
CogniVis - a mix of the two above. This chatbot operates on both the sources you have attached
and also uses its general knowledge to try to give the best answer using both
Of course, this is just the tip of the iceberg of potential possibilities. We can create personas
that:
Respond in a specific style (they can be friendly, formal, direct, encyclopedic)
Have a narrowed source to selected sources or document sets
Can be extremely specific and concise (we can instruct "always respond with one sentence") or
talkative (we can
instruct "respond as comprehensively as possible")
And so on and so forth. I think after such an introduction, you already understand the concept of
personas and
their potential possibilities.
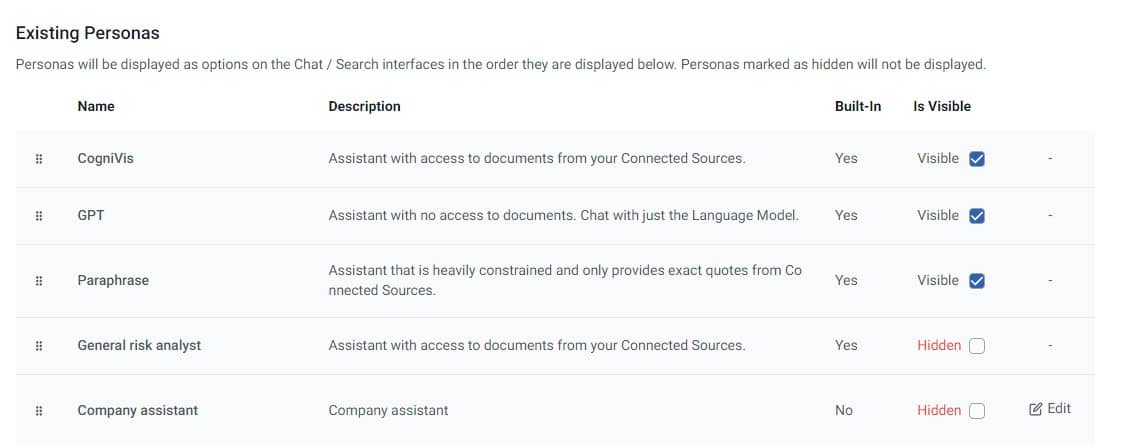
When you click on "Personas" in the admin panel, you will see a list of available
personas. You
can hide them here by clicking the checkbox next to "Visible". If a persona is marked as
"Hidden", it will not be visible in the chat interface.
Adding a persona
Let's try to add a test persona. Click the "New persona" button.
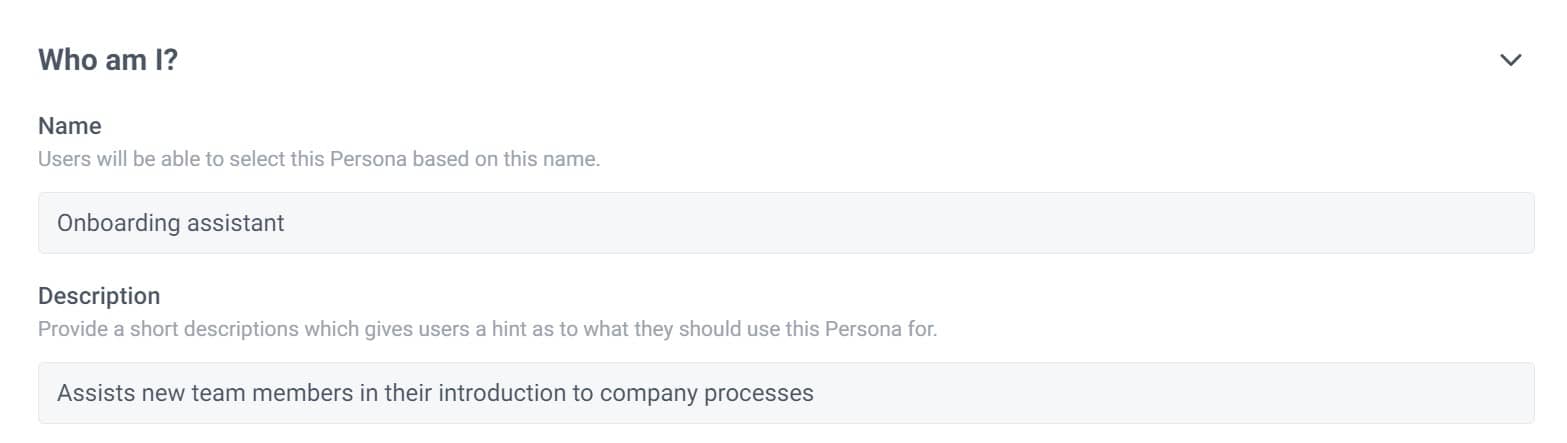
We have quite a few fields to fill in here. First, the name and description of the persona, which will
be displayed
in the chat interface. Let's fill in this information, for example, like this:
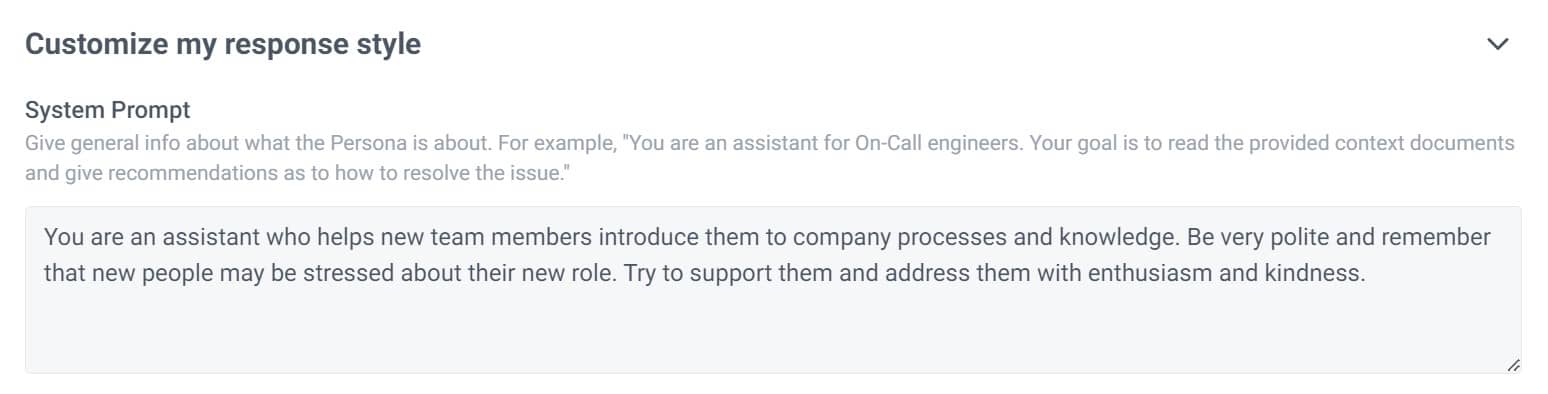
Next, we define the style of our persona. In this case, I instruct it to be a polite
and
enthusiastic assistant helping new members with onboarding.
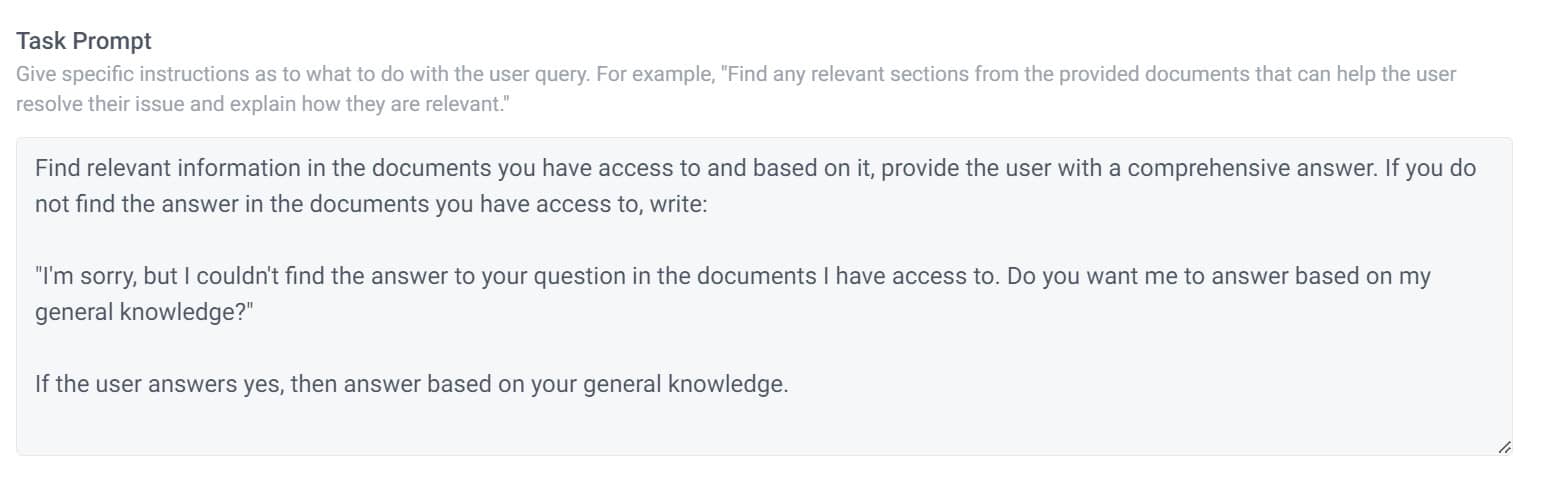
Then we specify the action we expect from our assistant. For example:
We can also specify data sources if we have previously prepared some document sets. If we do not have
any document sets, the persona will use all available sources by default.
There are also a few other options to choose from, such as changing the artificial intelligence model
or the number
of so-called "chunks" the assistant is to retrieve. However, these are advanced settings and for now, let's leave
them as they are.
When everything is ready, click "Create".
Once the persona is created, we can select it from the available options in our chat. Click on it and
ask a sample
question:
Author of hundreds of articles on AI, programming, UI/UX design,
business, marketing and productivity. In the past, an educator working
with troubled youth in orphanages and correctional facilities.